![]()
Data binding library is useful for creating declarative layouts and minimizing the glue code required to bind application logic and layouts. Data binding support library offers both flexibility and broad compatibility, and can be used on all android platform versions starting 2.1+ (API 7 onwards). This library is still in beta and has some caveats but developers are free to use it for production.
Developer’s guide for Data Binding.
Write apps faster with data binding library. The entire intent behind data binding library is to write app faster. Watch this video by google devs for more info.
This is exclusively for developers, the end user of your app will not see any difference whatsoever.
Introduction:
Binding data with UI is a very tedious task in Android. No matter what you are building to update even one UI element, you have to find it by id and then cast it into the widget you are using, then and only then, it can be updated. There was no proper way of binding data. With the announcement of data binding library in Google IO 2015, there is a better way. With this library, developers can write apps faster. It is support library and is supported all the way back to API version 7 (or Android 2.1). Check out the source code and snapshot attached with this article.
What is Possible with Data Binding Library:
With Data binding Library, you can:
- Write apps faster
- Remove “find view by id” and casting into widgets from your code
- Minimize glue code required to bind your UI and data
- Define custom attributes for XML layouts
- Bind custom variables and events
- Use observable fields so that UI gets updated automatically when state of a bind object changes (not covered in this article)
This is just a subset of what is possible. You can do a lot more. I will post more in upcoming articles.
Setting Up Android Studio:
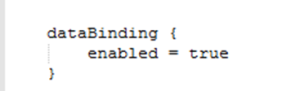
Before you begin exploring and developing with data binding library, a few steps are needed to set up your Android Studio IDE (must be 1.3 or higher and Gradle plugin 1.5 or higher). Set up your module’s gradle file:
android {
....
    dataBinding {
       enabled = true
    }
}
Add this dependency in your project’s gradle file:
classpath "com.android.databindig:databinder:1.0.-rc1"
And that’s it. Your Android studio is now ready for using data binding library.
If you are creating a library project using Android data binding library, the project using your library must enable data binding in modules gradle file (as explained above, data binder dependency is not required). Don’t forget to mention this in your library’s release notes.
Declaring a Data Bind Layout:
This is how we declare regular or normal layouts in Android:
<?xml version="1.0" encoding="utf-8"?>
<RelativeLayout xmlns:android="http://schemas.android.com/apk/res/android"
    xmlns:app="http://schemas.android.com/apk/res-auto">
    <TextView android:id="@+id/txt_version_name"
        android:layout_width="wrap_content"
        android:layout_height="wrap_content"......
For writing Data bind layouts, the root element of layout xml must be changed to <layout> tag. Optionally, include a data tag if a variable is to be used for populating UI elements or an import statement is required. Here is an example.
<?xml version="1.0" encoding="utf-8"?>
<layout xmlns:android="http://schemas.android.com/apk/res/android"
    xmlns:app="http://schemas.android.com/apk/res-auto"
    xmlns:tools="http://schemas.android.com/tools">

    <data>

        <import type="org.drulabs.secretspy.VersionItem" />

        <import type="android.view.View" />

        <variable
            name="vItem"
            type="VersionItem" />
    </data>

    <RelativeLayout
        android:layout_width="match_parent"
        android:layout_height="150dp">

        <TextView
            android:id="@+id/txt_version_name"
            android:layout_width="wrap_content"
            android:layout_height="wrap_content".....
As you can see from the above example, with just a little extra code, you can easily write data bind layouts or migrate your old layouts. No reflection hacks are used for this. All the processing is done in compile time. The <layout> tag tells the XMLLayoutProcessor that this is a data bind layout. The <data> tag is used to define a variable that is to be used in populating UI; and to import custom or other classes. For example, if View.VISIBLE property is used in data bind expression (as shown below), View class (android.view.View) must be imported before using it.
Some Data Binding Expressions:
In the earlier section, I explained what is possible with data binding library. Here is how you can implement those:
- Bind custom variables:
- Described in previous section is custom variable (
vItem) - Apart from that, you can bind arrays, lists, primitive types, sparse lists, maps and more
- All declaration and imports are inside
<data>tag
- Described in previous section is custom variable (
- Move basic UI logic to XML layout files:
android:text="@{vItem.name.substring(1)}" //substring in xml android:text='@{vItem.code + "(" + vItem.versionNum+")"}' //String manipulation android:visibility="@{vItem.even ? View.VISIBLE : View.INVISIBLE}" - Define custom attributes:
app:imageURL=”@{vItem.imageUrl}”
There is no such custom attribute. You can bind it with custom method definition, e.g.:
@BindingAdapter("bind:imageURL")
public static void loadImage(ImageView img, String url) {
    Picasso.with(img.getContext()).load(url).into(img);
}
Cool, isn’t it. You can imagine the possibilities with this. One awesome example is setting text font. Increases readability like 2 folds.
app:textFont="@{'awesome-font.ttf'}"

@BindingAdapter("bind:textFont")
public static void setFont(TextView tv, String fontName) {
    String fontPath = "/assets/fonts/"+fontName;
    // set font in text view here
}
Demo App:
Below is a screen shot of a sample app

You can download sample application from here. (Make sure you have followed the steps properly)
Let me know what you think. Happy coding!!!
Have questions? Did I miss anything? Shoot below in comments
-Kaushal D (@drulabs twitter/github)
drulabs@gmail.com
